
Authors: Audra L. Goach, Seth Croslow, Kyle McLaughlin and Steve Distin
Journal: ACS Chemical Education
Year: 2022
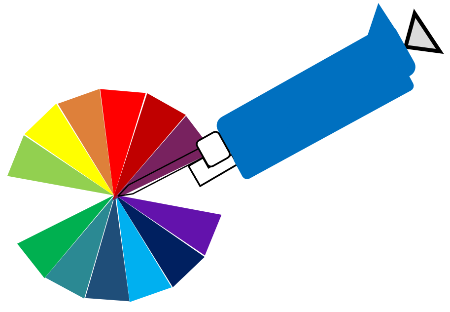
Feature image created by author of this article.
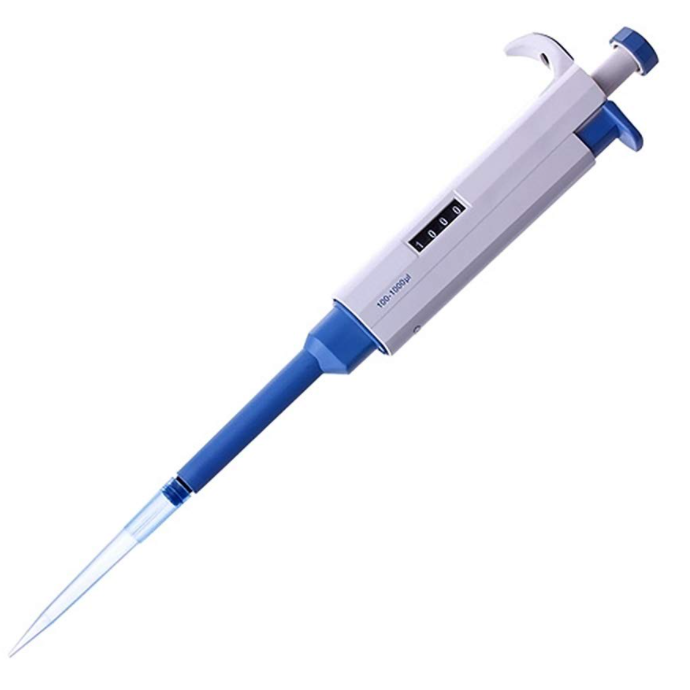
An expert in drug design, a battery materials chemical engineer and, a gas-phase chemist (to name a few) have all used a micropipette at least once in their professional life. In fact, it’s safe to say that almost all chemists around the world have seen and used a micropipette. Micropipettes, used to measure precise volume of liquid, are a category of lab tools that are surprisingly hard to master. Even experienced chemists have struggled with measuring the right volume using a micropipette, setting them to the correct volume, and dispensing the entire volume out properly. It’s a key skill that is often at the heart of silly, nagging doubts that lead to wasting chemicals and, in the worst scenario, high uncertainty in the final experimental results.
Skill learned in introductory laboratory courses go a long way in terms of their applicability in advanced lab courses as well as in their career benchwork. Micropipettes are first introduced to students in undergraduate STEM degrees where they are typically directed towards YouTube videos and some simple reading materials that go over the principles behind using the micropipette. While this is enough and satisfactory for the most part, there’s rarely a lab exercise focused on teaching students only on how to use the micropipette or any other type of pipette.
For this recent article in the Journal of Chemical Education, Goach et.al carried out an experiment in an introductory Analytical Chemistry course to improve student’s focus, skill, and accuracy in using a single-channel micropipette. The aim of the experiment was to raise the students’ confidence in:
- Identifying and using the right micropipette for a specific volume.
- Setting the right volume on the micropipette.
- Using the proper technique in drawing up, as well as in dispensing, a solution into the micropipette.
- Checking the accuracy of a micropipette.
As a part of the lab, students were provided with micropipettes of different sizes, a cotton bandana, and dyes in three colors- red, blue, and yellow, and were asked to recreate the color wheel (pictured in Fig 2) on a cotton bandana that had been soaked in caustic soda (so that the dyes can stick).
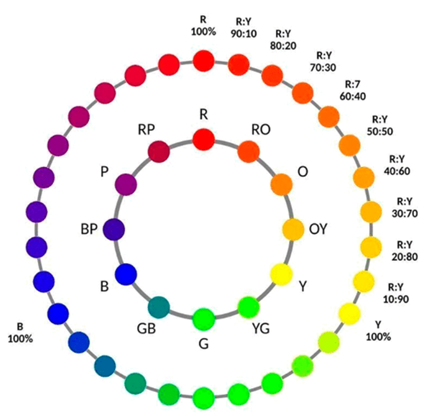
Students were evaluated on setting the micropipette correctly as well as following directions, solution preparation, accuracy spot placement and precision in spot size. The position of uniformly sized spots on the bandana was an indication of using the right sized micropipette. The placement of the right color on the bandana at the right spot, in addition to uniform spacing, meant that the right sized micropipette was combined with right setting for volume leading to a combination of exact volumes of the different dyes needed to make a particular color! Pretty cool, right?
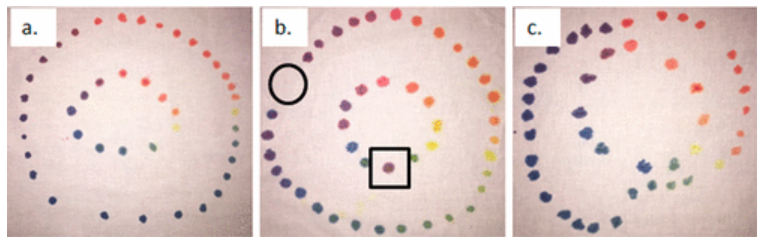
Any discrepancies in the color wheels produced by the students could be traced back to the exact error they made, leading to a definite understanding of exactly where they went wrong. This experiment provides a visible proof of the students’ micropipette-ing skills.
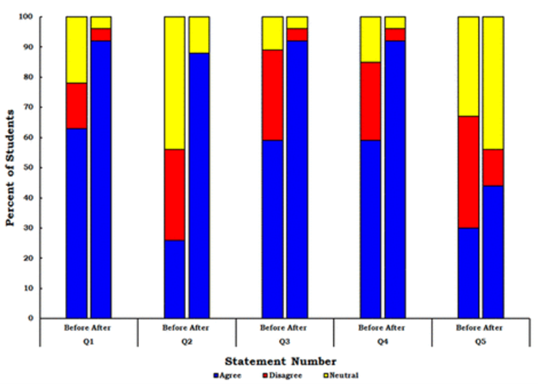
The students’ confidence in using the micropipette was measured through a survey that consisted of both a pre-lab assessment of their skills as well as a post-lab assessment. Fig 4 displays the results from the survey where blue represents “agree”, red “disagree” and yellow represents “neutral”. While four broad aims of this experiment are mentioned at the beginning of this article, the authors broke down one of them into two specific questions (student confidence regarding drawing up and dispensing liquid from the micropipette). Most of the students felt confident in their ability to use a micropipette properly. However, a higher percentage of students felt neutral about checking the accuracy of their micropipette (this was a broad aim of the experiment but not a skill taught in it).
A visually engaging lab exercise like this goes a long way in teaching students how to use a key lab tool like a micropipette along with a real-time visualization of any errors in their technique. Designing a detail-oriented experiment such as this one teaches students the importance of laboratory manuals and systematic experimentation. In conclusion, this paper presents a colorful way of fine-tuning one of the most necessary skills obtained in a chemistry laboratory, one that can transfer easily to any industry or research position!